This post assumes knowledge of logging in, navigating to the post section, getting into the editing screen on a post, and basic familiarity with the editing screen. If you need more basic information than this post provides, see the Simple WP Guide. It walks you through the very basics and is a great way to get started.
If you know all of that already, this guide should help you bring your WordPress posting skills to the next level. If you’re looking to go even further, there are a number of side-notes in this post. Use them as opportunities to search further into these topics — while they are not covered directly in this blog post, they can advance your skills even further.
Visual versus Text
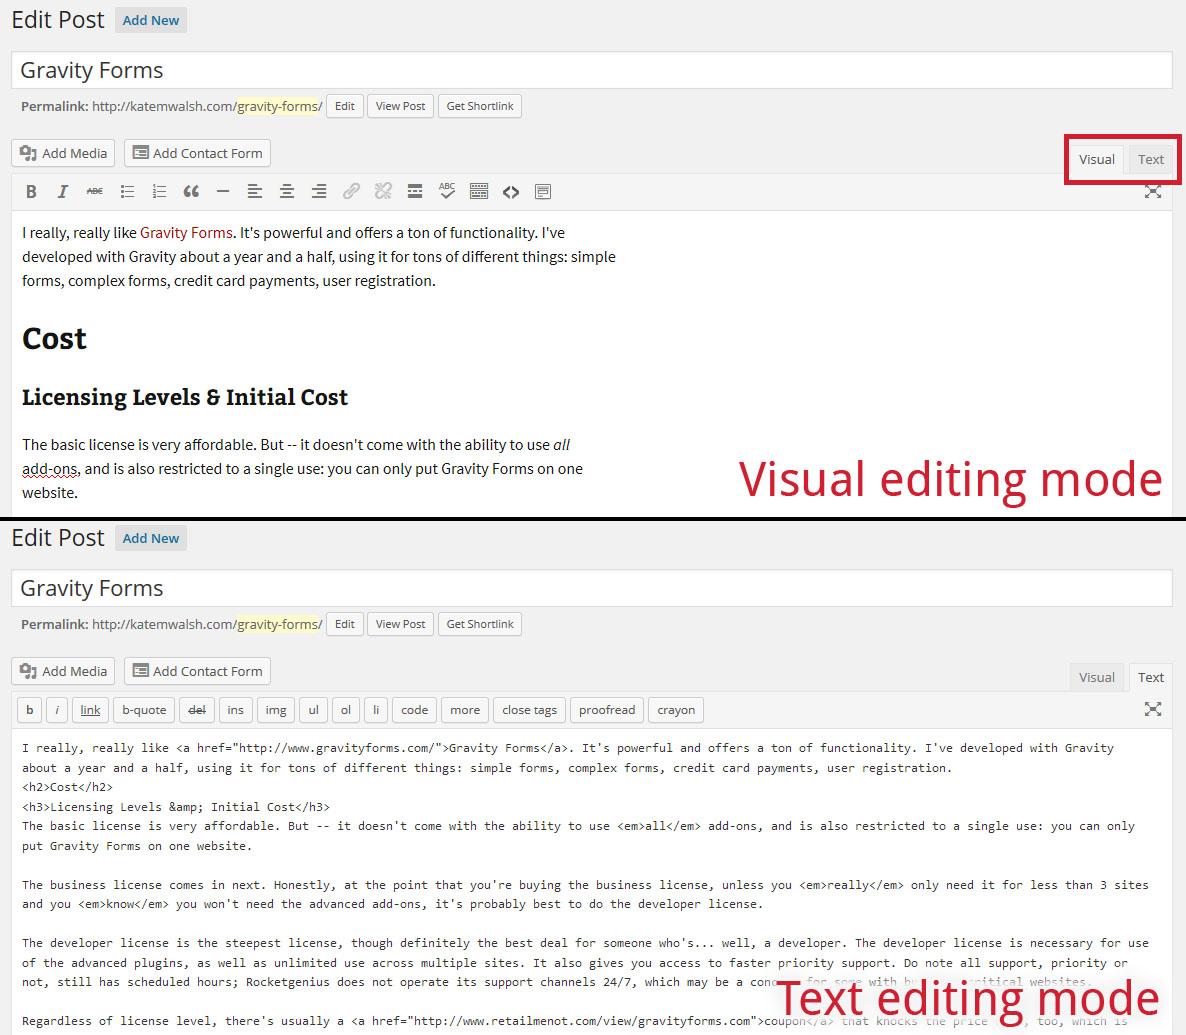
There are two editing modes in WordPress. There’s the Visual editor, which you’re probably used to. It’s the default editor, and most people don’t change it. However, there’s also the Text editor. If you haven’t seen the text editor before, swapping it over and seeing a mountain of code can be pretty intimidating. You might want to go back to the Visual editor immediately — but if you don’t at least switch back and forth between the two now and again, you’re missing out on some functionality you might want.
Visual Editor
The Visual editor is the one most WordPress authors are familiar with. There are buttons at the top you press that help you format your post, which is great. It shows you pretty much how the post will look on the front end of the site — pretty much. There can be some formatting differences between the actual posted page and your view in the Visual editor, so it’s a good idea not to rely on the Visual editor as an absolute measure of how things will look.
Your Visual editor can have a lot more buttons than mine does in the example image. Some themes and some plugins are advantageous in that they offer buttons to help users insert certain codes and styles into their posts. These can be pretty powerful, so do check them out if they show up in your WordPress — but there are so many ways that these buttons can be customized, I won’t say much more about the Visual editor than that.
Text Editor
Here’s the scary part! The text editor exposes the HTML — Hyper Text Markup Language — of your post.
It might be intimidating to look at these codes, but try to remember: HTML is basically only formatting for your purposes. You can’t do serious damage to a website with just HTML code. As long as you have someone else who can come in and fix any big mistakes, you can’t do lasting damage to a WordPress page by changing the HTML within the post editor.
Adding Images to Posts
Note About Image Sizes
If you’re uploading images to the web, especially digital photos you took yourself, you might want to size them down. There’s really no reason — unless you want to offer the raw, full-sized image — to include a 5,000 x 3,000 original-sized image. That’ll be a huge upload and download in terms of megabytes. Mobile users will not appreciate this.
You can use many different programs for resizing images — from simple Microsoft Paint all the way to advanced batch image processing in Adobe Photoshop.
Uploading Images
Uploading images is as simple as clicking the “Add Media” button at the top of the post. You can then drag any images you want to upload directly on the page. Open the folder where your images are stored, and drag from there to the WordPress page. That’s it!
If you’re more comfortable, you can click the “Upload Images” tab and browse for the images on your computer.
Image Alignments

- None: Use this if you want your image to display in its own content block, without other content surrounding it. Similar to Center except the image is aligned left (so the default, none) instead of center.
- Right: Use this if you want your image to display flush with the right-hand side of the page or content, with other content such as text wrapping around the left side of the image.
- Center: Use this if you want your image to display in its own content block, without surrounding content, and centered in the page.
- Left: Use this if you want your image to display flush with the left-hand side of the page or content, with other content such as text wrapping around the right side of the image. Be wary of left-floated images. They can interfere with readability somewhat, as they alter the left margin. The left margin is the reader’s anchorpoint as they skim or read your document, and so breaking that line of text with an image is not great for the reader. Default to right-floated images, or — if you want the image to the left — use None for your alignment.
Image Title, Caption, Alt, and Description Tags
For your purposes, most of these are relatively similar. There’s some very, very minor benefit in optimizing for all three of four fields when uploading an image. However, I usually just leave the title as it is when the image is uploaded, and copy/paste the same thing into the Caption, Alt, and Description. It is important for you to fill out at least two of these fields:
- The image’s Alt tags help describe the image, especially to people using the Internet on a screen reader.
- The image’s Caption shows up beneath the image when you generate the image code by pressing the “insert” button — or when you create a gallery via WordPress.
Creating a Gallery
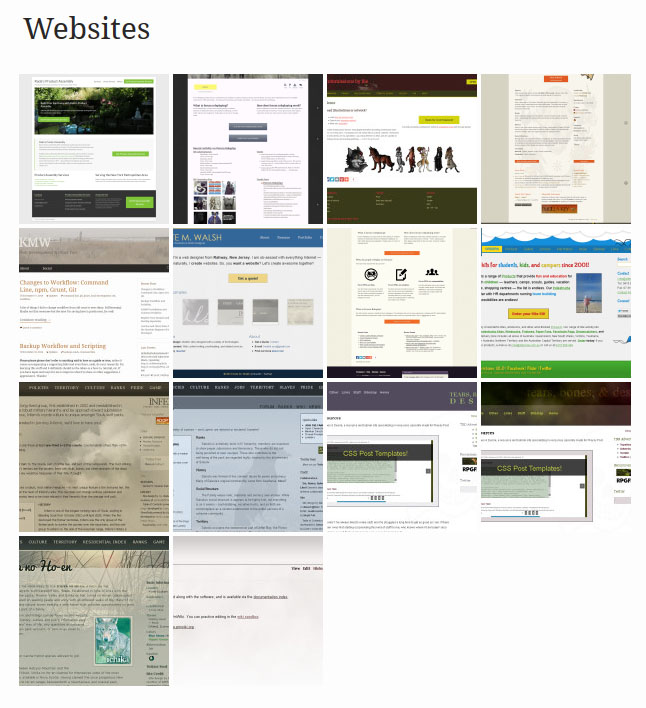
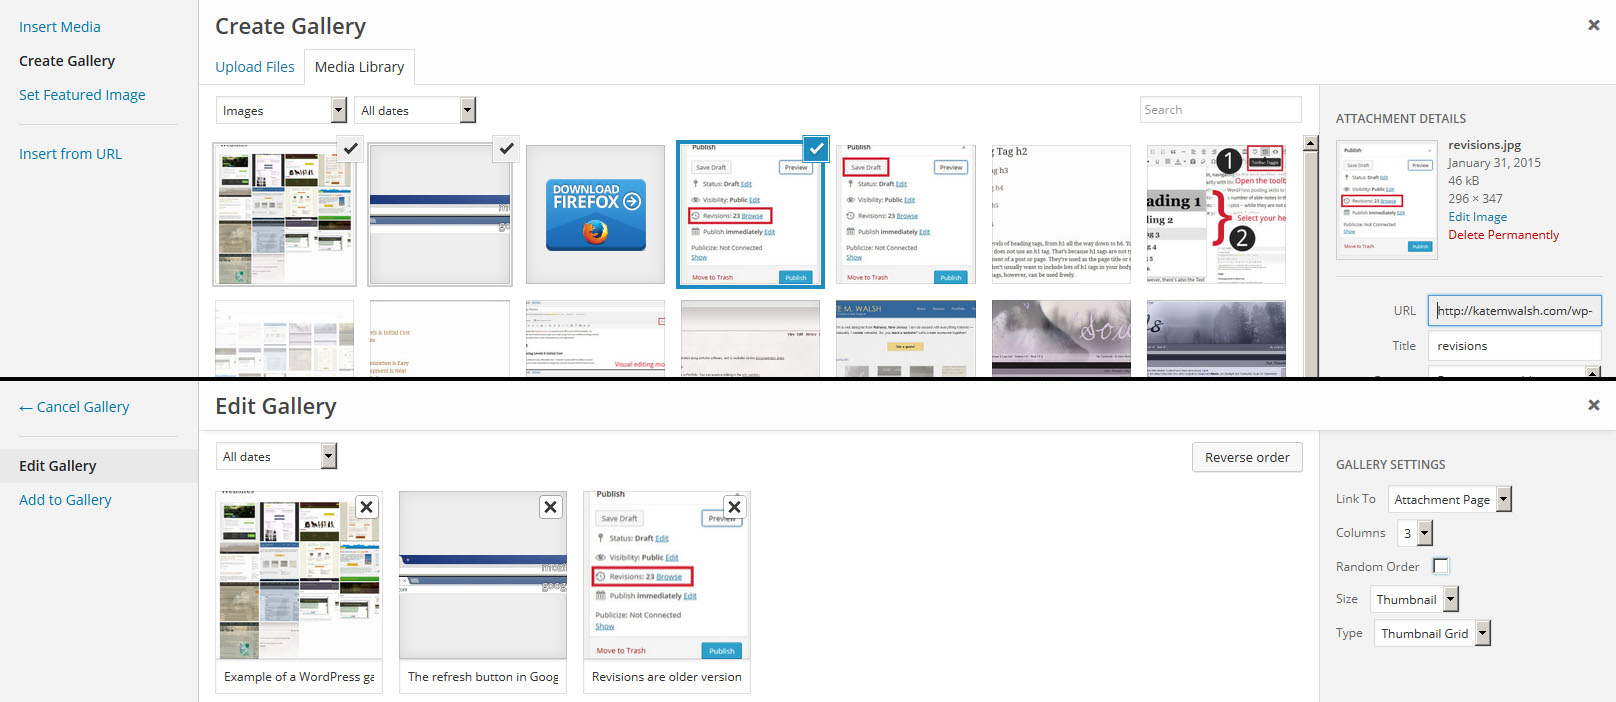
Creating a gallery is a somewhat similar process as simply adding an image to WordPress. You click “Create Gallery” instead, though, and select multiple images from your media library. If you’re uploading all the images for a particular gallery at once, they will be automatically selected when you click “Create Gallery.”
On the right-hand side, once you’ve moved onto the second gallery creation screen, you can set a couple of the aforementioned options (e.g., columns, size).
Basic Formatting to Know
Pasting into WordPress
As noted by David Tierney, it’s important to realize you may sometimes paste formatting into WordPress when you copy text from something like Microsoft Word.
Likely, you’ve experienced the same thing pasting into Microsoft Word and other rich text editors before, right? WordPress is a little different — it strips out most of the gunk, including font styles and colors.
It’s not perfect, though, and there’s usually some amount of gunk leftover. You might save yourself some headaches by swapping over to Text editing mode, pasting your content, and then swapping back to Visual mode if you’re more comfortable there.
Automatic Paragraphs
WordPress automatically creates paragraphs for you when you hit enter twice. You don’t have to worry about inserting <br> tags in your content.
Heading Tags
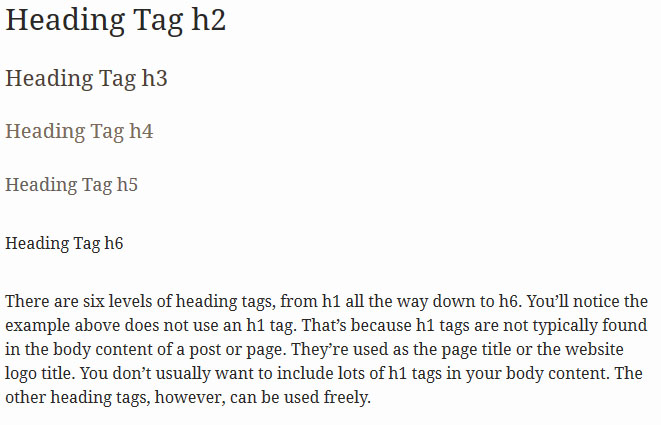
They’re exactly like heading formats in Microsoft Word and other word processing documents. Well-written, relevant heading tags are also great for SEO (Search Engine Optimization).
You’ll notice the example above does not use an h1 tag. That’s because h1 tags are not typically found in the body content of a post or page. They’re used as the page title or the website logo title. You don’t usually want to include lots of h1 tags in your body content. The other heading tags, however, can be used freely.
How to Use Heading Tags
Heading tags are fairly simple in HTML code:
<h2>Your Heading Text Here</h2>
That’s it! You can swap out the “2” for 3, 4, 5, or 6.
Tips for Heading Tag Use
Be Wary of h5 and h6
Be wary of using h5 and h6 tags (I say, directly after I write an h5 tag). For “lighter” content, you generally do not want anything deeper than an h3 at most. h4 can be used sparingly.
If you’re using h5 and h6 tags in certain contexts (e.g., a blog post you hope will be highly shared across social media — even viral) you are probably doing yourself a disservice. Your content is either over-organized, or it’s too long for one page.
h4, h5, and h6 heading tags are perfectly acceptable if you’re writing a long, informative blog post (hello!). However, even I try to avoid h6 tags. That fine-grained an organization requires a truly gargantuan page. For better or worse, those huge, super-long pages are rarely found on the web anymore.
Organization is the Key

Remember, you’re trying to organize the page.
If you’re writing a list-based blog post, maybe you want emphasis on the number and the first sentence of the list. If so, you’ll want to use all h2 tags for that list, or all h3 tags. Because each list item has the same importance and emphasis, you don’t want to count down with heading tags as you move down through the list. All the items in that list are of equal importance.
If you’re having trouble figuring out which heading tag to use, try to visualize — or even write down! — a table of contents for your post. This is a good way to map the organization of your post, and figure out which tags should go where.
Code Tricks to Know
Although a lot of formatting can be done within the Visual editor, it’s not the best. Some of your pages could actually be quite messy in terms of code, once you flip over to the Text editor.
Generated code is almost never as clean as what a human being can write. Even if you’ve never written a line of code in your life… you, too, can write cleaner code than WordPress can generate!
style="clear:both"
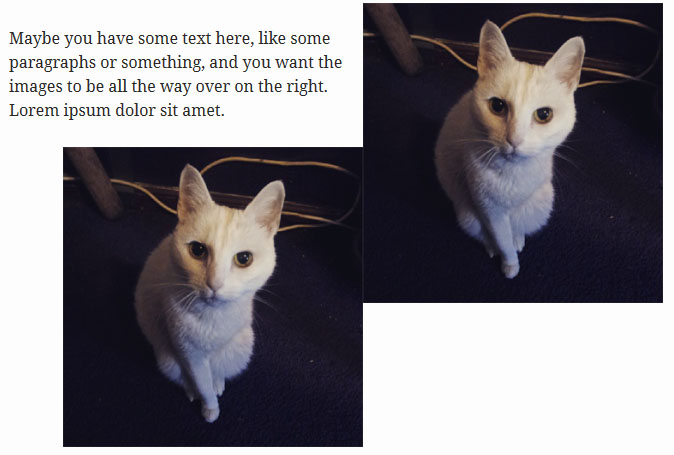
Say you have this code, and it’s displaying like in the example image.
Maybe you have some text here, like some paragraphs or something, and you want the images to be all the way over on the right. Lorem ipsum dolor sit amet.
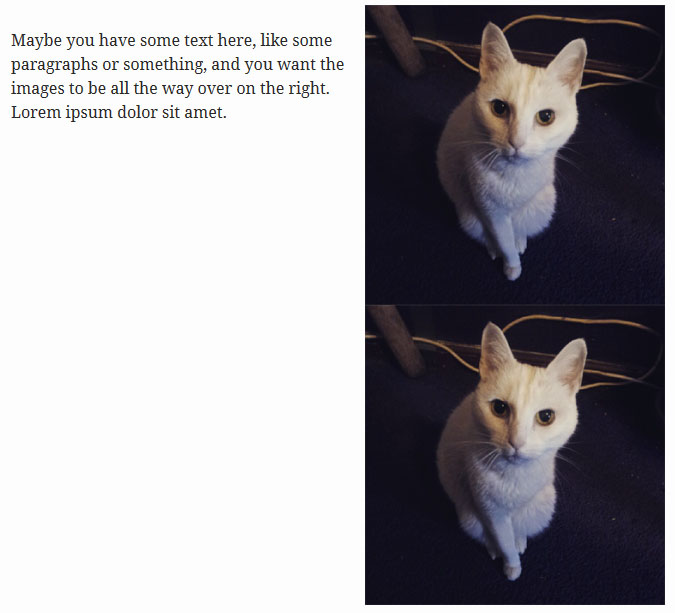
Swap over to Text editing mode and do this:
Adding style="clear: both;" to the second image tag forces the second image to clear the first. Note: you’ll probably need to add a space, too — imgstyle="clear: both;" ... will not work.
style="clear:both;" on any element. It works for header tags, too!
Please note that peppering this tag throughout your WordPress code is not the best thing to do. It’s better to let your web developer know. A more permanent fix can be implemented, so that all future images or headers clear right and left floating images or text boxes.
However — style="clear: both;" can still save you in a pinch, if you really need to get your post up and you can’t wait for the developer’s permanent fix.
WordPress inserts a lot of tags into your posts. The tag is HTML for a hard space. When writing HTML into something like the Text editor in WordPress, if you enter a lot of spaces by hitting your spacebar repeatedly, they won’t show up when you save and view the page. HTML doesn’t care how many times you hit the spacebar. It only uses one of those spaces under normal circumstances. So — provides a way for you (and WordPress, automatically) to insert extra spacing into your posts.
The problem is, most of the time, you probably don’t want this extra spacing in your post. The extra spacing can gunk up other formatting and make things look weird. This is especially true if you’re trying to center align some text. The centered alignment takes those blank spaces into account, and your “centered” text is off-center!
Feel free to delete tags wherever you find them upon swapping over to the Text editor from Visual.
Weird Blank Spaces, Blocks of Different Fonts, Other “Strange” Stuff
Check for Standard WordPress Formatting

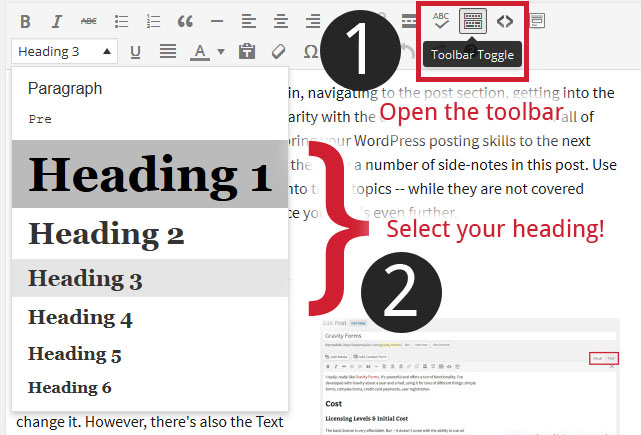
- Make sure your formatting toolbar is fully expanded.
- Click into the part of text that looks strange.
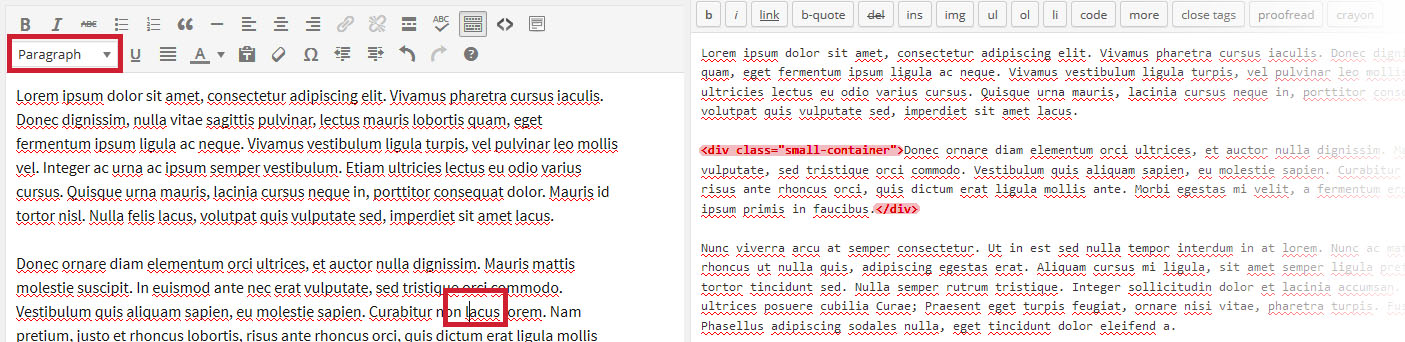
- Check out the example image — see how it says “Heading 3” in the highlighted part?
This text has been somehow set to the Heading style of text. You’ll need to reset it to “Paragraph” — the default setting — in order to fix your issue.
Check for Strange HTML Tags
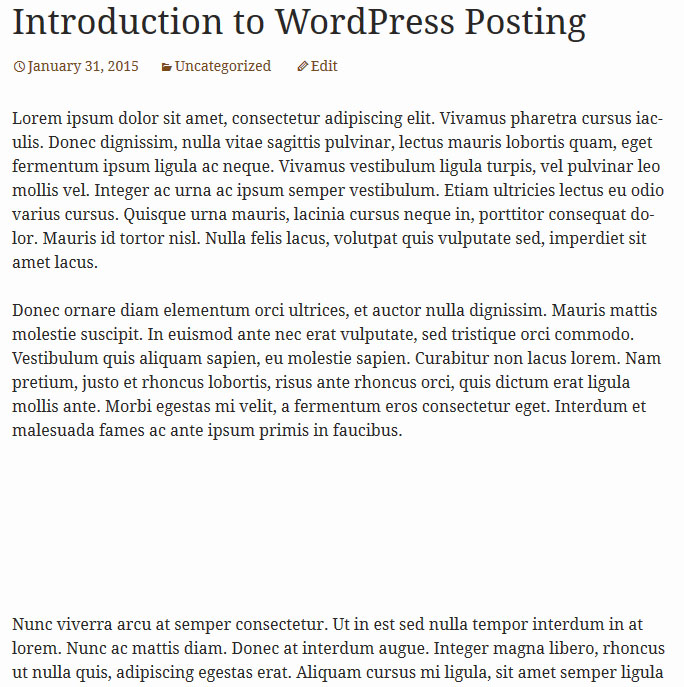
Sometimes you’ll encounter strange formatting in your posts — formatting that doesn’t correspond to a WordPress formatting setting.
The example at right shows what happens on previewing the post. Even though there’s nothing wrong at all in the Visual editor, previewing or saving the post reveals a strange block of blank space beneath the second paragraph.
Swap over to the Text editor and inspect the text with funky formatting for strange HTML tags surrounding it. HTML tags usually begin with < and end with >. For example — <div class="small-container">Strangely formatted text here!</div>.
Be careful playing too much with the HTML tags you find in Text mode. A stray tag that doesn’t seem to belong anywhere can probably be safely removed — but you also don’t want to muck with the formatting too much, either.
Standard WordPress Functions You’ll Enjoy
Draft Posts
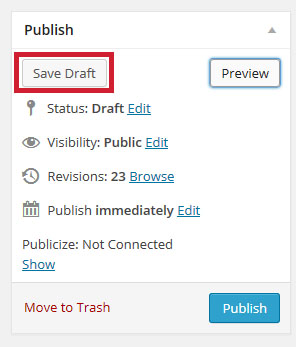
When you’re all ready to go, you can simply press the “Publish” button on a draft post.
Previewing Posts
You can preview a post before you publish it or before you make changes to an existing page. This is a very good thing to do — your preview will open in a new window, allowing you to continue editing while you have the preview open.

There’s a workaround, at least for posts you haven’t published yet:
- Hit Preview once. Maintain the preview open in a second tab in your browser.
- Save your post as a Draft.
- Go back to your preview window and refresh the page, either by pressing the refresh icon in the address bar of your browser or pressing F5 on your keyboard.
- You’ll now have an updated preview of your page, and you’ll be pulled down on the page to the same spot you were reading before you edited.
Revisions
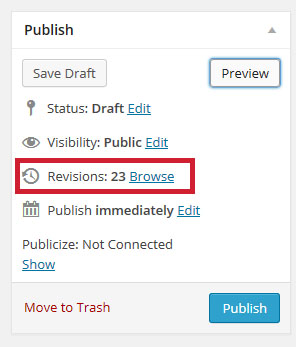
You can either revert the page through the WordPress admin panel directly — or you can copy-paste content you want to take from an older page version. If you copy/paste, you’ll probably have to fix some of the formatting, you’re likely to get a lot of blank spaces.
Differences Between a Standard WordPress and Your WordPress
Here’s the rub — because WordPress is so infinitely customizable, your installation may be entirely different. You may be using WordPress and you might be totally unaware of it, even — the back-end screen can be customized to such an extent that it’s very nearly unrecognizable.
This is great because it’s what has made WordPress so powerful, but it sucks for you because your WordPress — if you had one custom-developed, for instance — is probably completely different from what you’re seeing here.
And, unfortunately, unless you know how to dig around in a WordPress installation, it’ll probably be pretty tough for you to figure things out.
If you have any documentation for your WordPress in particular, review it. Hand-written documentation specific to your installation is a wonderful thing to have. If you know someone has advanced knowledge of your particular installation, asking questions can do a lot of good!
Failing that, you can try to look in the Plugins list to see what’s installed for your WordPress. Googling the name of a plugin should lead you to that plugin’s documentation. You can read up on how to use it there.
Be careful in the Plugins panel — don’t click anything accidentally or on purpose.
Shortcodes

What Shortcodes Can I Use?
Shortcodes are tied to themes or plugins — they are different for virtually every WordPress installation. You won’t find “standard WordPress shortcodes” outside of “gallery” and “caption” tags and similar because WordPress doesn’t offer shortcodes without further customization. However, if you do find a button offering shortcodes on your post editor, be sure to check them out.
Types of Shortcodes
Shortcodes are always wrapped in brackets. They come in a few common flavors:
[shortcode]Text within shortcode[/shortcode]. You can place custom text within this shortcode, and it has to have an ending tag.[calendar_widget_shortcode]. This shortcode does not accept custom text, and it’s self-closing — it doesn’t need an ending tag.[postlist_shortcode posts="10" order="ascending" style="blue"]. This shortcode does not accept custom text, and it’s self-closing — it doesn’t need an ending tag. However, it also accepts arguments — 10 posts, in ascending order, with the style blue. Arguments are things that change the output of the shortcode.
WordPress Post Formatting Resources & Tips
Tips
- One of the best things you can do to learn WordPress formatting is by playing with the formatting buttons on a post or page and seeing what they do. It’s best to ask someone to create a private page just for you to test on.
- Learning some basic HTML tags is very helpful. You can learn this — to an extent — by studying what WordPress does to accomplish something and swapping between the Visual and Text editors. You might notice, for example, that lists with numbers are created with <li>list items</li> created for each bullet, wrapped with <ol>ordered (numbered) list tags</ol>. As a post writer and editor, this basic HTML knowledge can help you fix formatting problems.