What We’re Trying to Do
We’re trying to set up a local web development environment on a Windows computer with an XAMPP installation. XAMPP will allow us to run Apache and MySQL on our local computer.
We want Apache and MySQL because without them, we cannot run PHP/MySQL applications such as WordPress or phpBB. JavaScript, HTML, and CSS will run on our computer without a problem, but we need additional software to run PHP/MySQL applications.
XAMPP is neat, but unfortunately, the only official documentation consists of FAQs. It can be pretty overwhelming at first. Alternatively, there’s WAMP. It is supposed to be a little more user-friendly but I can’t personally attest to that, as I’ve never used it.
What We’re Using
I’m using Windows 7 and XAMPP 1.8.3.
Optional: I’m using Notepad++ for editing files. You can use regular Notepad (you’ll probably have to Right Click > “Open With” > Browse for the program when we edit files). Notepad is a pain and you should probably get Notepad++ or Sublime Text for editing files.
Installation
Get XAMPP from Apache Friends. Usually installation is not problematic; if you want to just let it whirl with the default settings, go ahead.
However, you may not want to install Tomcat and Mercury. They won’t hurt anything, but you probably don’t need either. It’s is just a tiny sliver of space you can save.
Tomcat is used to run Java (not JavaScript). If you aren’t writing Java, you don’t need Tomcat. Mercury allows you to send e-mails through your XAMPP installation. Mercury is definitely useful if you’re building an application that may send a lot of mail at once to many users. However, if you aren’t actually building an e-mail feature and you want to test the mail function of something like WordPress, it’s best to test e-mail on a live server. The settings on your live server might be very different, so the local test is kind of superfluous.
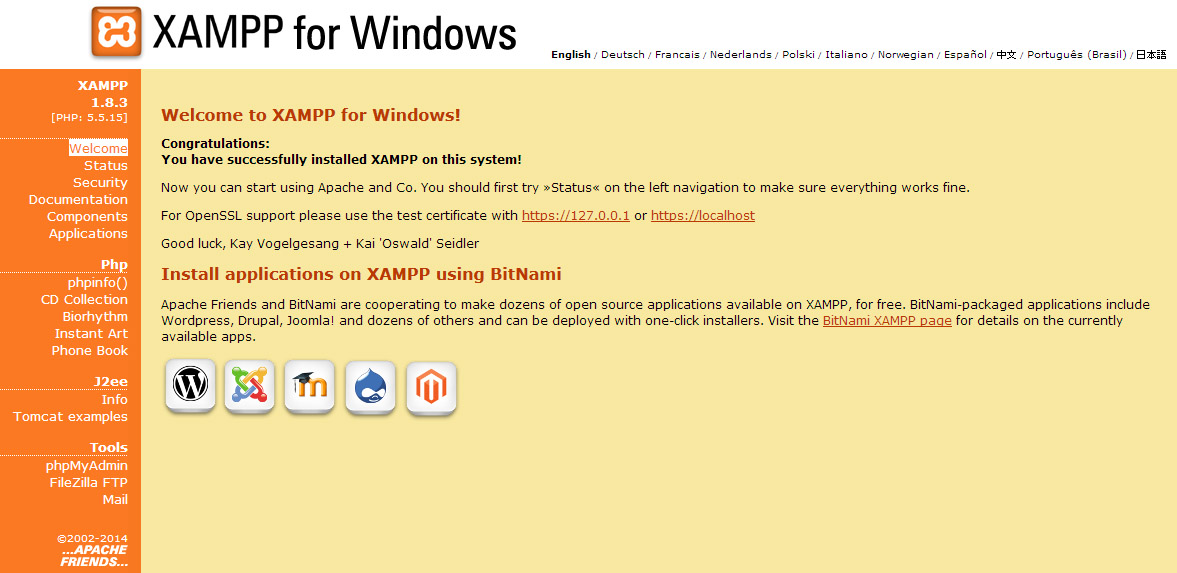
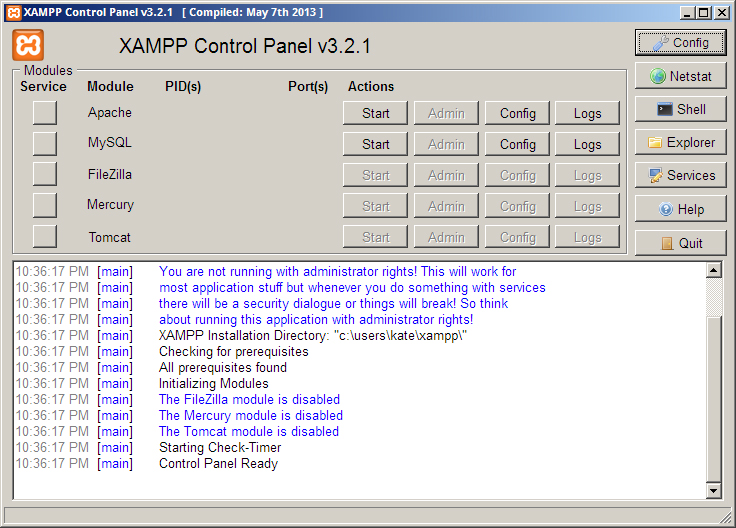
Once it’s installed, fire up the control panel and start Apache and MySQL. Once they’ve started, go to your browser of choice and type localhost into the address bar. After selecting a language, you’ll be presented with the XAMPP home screen. Your installation is working, yay!
Make sure to stop Apache and MySQL before you do the next changes. You can make the changes if you have them running, but you’ll need to remember to stop and restart the services after you’re done with the set-up. Otherwise, your virtual hosts will not work.
Setting Up Virtual Hosts
You’ll want to set up virtual hosts (fake domain names, essentially) for development.
If you don’t set up virtual hosts, you can run into problems setting the URL of your website, as well as accessing images, CSS, and links. It also makes the transfer from your local site to your live site more painful, as there’s greater potential for broken links.
With virtual hosts, you can use relative URLs (URLs starting with /) for your resources (images, CSS, links, etc.) as you develop. The transfer from development to production will be seamless*, with no broken links.
Basically, there are three steps:
- Apache Vhosts File: Editing your httpd-vhosts.conf file.
- Windows Hosts File: Editing your hosts file.
- Adding the Site Files: Tossing your website’s files into the appropriate folder.
Apache Vhosts File
Navigate to the folder where your Apache vhosts file is located. That’s usually C:\xampp\apache\conf\extra. The file you want is httpd-vhosts.conf.
Go to the end of the file and insert the following. Replace the [site-name] and [name-of-folder] tags (don’t forget to remove the brackets, either) with the appropriate values.
Template Example
    ServerAdmin webmaster@dev-[site-name].com
    DocumentRoot "C:/xampp/htdocs/[name-of-folder]"
    ServerName dev-[site-name].com
    ErrorLog "logs/dev-[site-name]-error.log"
Actual Example
    ServerAdmin webmaster@dev-mycoolsite.com
    DocumentRoot "C:/xampp/htdocs/mycoolsite"
    ServerName dev-mycoolsite.com
    ErrorLog "logs/dev-mycoolsite-error.log"
The vhosts file also provides an example code for you to work with. Use that as a template or copy this one here — it doesn’t matter, they’re pretty much the same.
Preferences
I usually name the host dev-[name].com — truncating longer names. So for katemwalsh.com, it’d be dev-kmw.com. But — you can do whatever you want here, with one caveat: don’t name your development ServerName the same as your live site (or any other site you frequent). If you do, you won’t be able to view your live website. Your changes will redirect you to your development site.
Windows Hosts File
This one’s easier. Navigate to the folder C:\Windows\System32\drivers\etc and open the “hosts” file. Again, you may need to right click to open it up in Notepad++ for editing, or you may need to browse for the correct program. Add this at the top of the list:
Template Example
127.0.0.1   dev-[site-name].com
::1   dev-[site-name].com
Actual Example
127.0.0.1   dev-mycoolsite.com
::1   dev-mycoolsite.com
You do not have to change the IP address. 127.0.0.1 and ::1 are both addresses for localhost. Localhost essentially means “this computer.” So now, after this change — when you type in dev-mycoolsite.com, your computer looks on itself to find the files.
Adding Files
Now you need to add the folder where your website will live and put the files there. Navigate to the htdocs directory of your XAMPP installation, usually C:\xampp\htdocs\. Create a new folder, and name it what you named DocumentRoot in the first step when you edited your Apache vhosts file:
DocumentRoot "C:/xampp/htdocs/mycoolsite"
Your folder name here has to match whatever you named the folder (in this case, “mycoolsite”) in the first step. The DocumentRoot is where XAMPP will look for your website, so this needs to be the folder where the files are. If they don’t match, you’ll get an “Object Not Found” error — which is basically the same thing as a 404 error. XAMPP is telling you it can’t find the folder you’re trying to access. Check to make sure DocumentRoot is the same thing as your folder name.
You can extract a ZIP file directly into this folder now, or download an already-live site here.
Restart Apache
If you stopped Apache before, restart it now. If you did not stop the Apache service before altering your vhosts and hosts files, you will now need to stop and then restart the Apache service before your virtual hosts work.
MySQL Database
Possibly Optional. If you’re installing a PHP application, you’ll probably need a MySQL database, too. XAMPP has phpMyAdmin built in, accessible from the XAMPP index screen when you type localhost into your browser.
Also, a tip — keep your database name, user, password, etc. the same as it is on your live server. It might be tempting to just use the root user without a password locally, but this adds more steps to the switchover from local to live.
Bitnami?
Alternatively, you can use Bitnami to install WordPress. I have to be honest and say I never use automated tools for installation. I prefer manual installation by getting what I need straight from the source. This guarantees two things: I’m getting the most updated version, and it hasn’t been bloated with “helpful” things the installer decided to add (sometimes a problem, not necessarily with Bitnami).
Common XAMPP Issues
Apache Won’t Run
The port Apache is trying to run on may be blocked by something else. Skype is a common culprit and an easy fix. Stack Overflow has some answers if Skype doesn’t solve your issue.
Can’t Access localhost (XAMPP Home) After Creating Virtual Hosts
When I first started on XAMPP, I found after getting virtual hosts running, I could no longer access the XAMPP homepage at localhost. You have to actually set up a virtual host for that, too, and afterwards it’ll work just fine:
    ServerAdmin webmaster@localhost
    DocumentRoot "C:/xampp/htdocs/"
    ServerName localhost
    ErrorLog "logs/localhost-error.log"
WordPress is Redirecting to My Live Site!
If you had a live website and installed your live site locally for the first time, you may find the site — especially a WordPress site — automatically bringing you to your live website.
That’s actually a good thing, and it isn’t an XAMPP problem. Your local installation is working — but we have a few options to change.
You need to update your local (local — not live!) WordPress settings. You can do so by entering your locally hosted version of phpMyAdmin. Enter the wp_options table. Display 500 rows, CTRL+F for your-live-site-url.com and change the two instances where it appears: siteurl and home.
These settings might also exist in your wp-config.php file, where your siteurl and home variables can be hard-coded. For other options, check the WordPress Codex.
Other Notes
Staging Environment
If you have a local development environment, you should probably use a staging environment, too. This can be a separate domain or a subdomain of your live website.
You want to put your locally developed website on the staging server to perform one last test before shoving everything onto your live website. Environment differences between your live server and your local XAMPP installation can also cause breakage, and it’s good to avoid potential downtime.
Sharing XAMPP on a Dedicated IP LAN
Working on a local area network (LAN), want to share with your co-workers? Hop on their computer and make the same edits as described in Windows Hosts File. Instead of using 127.0.0.1, use your computer’s IP address (leave off the ::1 declaration on their computer).
You can get your IP address on a Windows computer by opening the command prompt and typing ipconfig. Your IP address will come up as IPv4Address. The rest of the numbers shouldn’t matter.
Note that this won’t work without a dedicated IP address for your machines.
Using XAMPP for Production
You should not use XAMPP for live websites. It is built extremely insecurely to allow the developer maximum freedom without having to play with permissions for everything. In a production environment, this is simply unsafe and exposes your site to malicious activity.
While you can maybe fix this with know-how and secure everything, it’s easier to maintain updates with standalone technologies. Using XAMPP requires you wait for Apache Friends to update. It’s probably going to be easier (and safer and faster) for you to do your own updates on technologies such as Apache and MySQL.
Lastly — I definitely don’t know enough about server administration to say this for a certainty, so don’t take this as gospel — it seems counterproductive to install an added layer of software between your server and its services? If you’re starting the XAMPP control panel and then starting Apache from it, that’s adding another layer of complication. You could install Apache, MySQL, etc. directly on your server and avoid XAMPP altogether — thus avoiding any crashes or complications from running XAMPP.