Speed optimization is important for your website. It is very easy to build a bloated site, and that’s obviously bad — but why an optimized site? Several reasons:
- You use less server resources (thus your site is more scalable in the face of lots of traffic).
- Your site loads faster, meaning:
- Human visitors are less likely to click away from your site (people give about 2-3 seconds for your site to start showing content before leaving).
- Search engines give preference to faster sites in search engine rankings (NB: albeit very slight, and as one factor in many).
Both of the above items are great for your site’s SEO efforts. Human visitors clicking away less frequently from your site reduces your bounce rate. A more highly-ranked site means more visitors to your site in the first place.
You can optimize images, scripts, and basically everything you send out from your server.
Optimization at This Level
Optimization is generally pretty easy at the level you’re working on. For anything faster or better, you’d have to delve deeper and head to the server level. Page-level, you don’t need to drive yourself mad achieving a perfect speed.
 For instance — I tried to make this site, katemwalsh.com, as fast as possible. The biggest speed boost? Moving from a shared host on JustHost to a Linode VPS.
Sure, everything else I did — smashing images, minifying HTML, using a cache plugin, etc. — helped immensely, and brought the site from over 1 MB to 525 KB. Making sure your site runs fast can help tons on shared hosting — another of my sites, despite being 2 and a half megabytes in size, still loads in 3.3 seconds on shared hosting. But for most people, especially moving off shared hosting, the biggest boost in performance is going to come at the server level.
Optimization for High Traffic Sites
Although all of this stuff is helpful, this is not where you should be looking for speed and performance optimization where it concerns large sites. Most of the speed tweaks for large sites are server-side — e.g., MySQL tweaks, switching to ngnix over Apache, using a different machine for database and files, etc. On sites that handle lots of traffic, you definitely need to dig a bit deeper than these changes.
Things to Do
Image Optimization
Images are often some of the largest assets on your site. I’ve personally seen plenty of sites that ship out 2 MB PNG files consisting of 90% whitespace! These images can be compressed, saving tons of KB (and even MB). Again, as images are often the largest assets your site has, reducing the size of your images can be huge in terms of speeding up your site.
There are many ways to optimize your images — from those built into Photoshop (e.g., JPG quality) to online tools such as TinyPNG (which also does JPGs). There are WordPress plugins such as EWWW Image Optimizer.
Reduce Requests
Anything you can do to request the number of requests on your site is great to do. Even if you’re using a cache or minification plugin on your WordPress install, or doing something else server-level — if you can get rid of that stuff before it hits your server, all the better.
For example — I don’t use the WP emoji feature. I disabled it, and saved myself 3 front end requests. It didn’t make a huge difference in speed or page size, but every little bit helps.
Minification
Minification is the practice of compressing and reducing the size of code. Generally, it involves stripping whitespace, tabbing, and comments from code. This can make a pretty big difference on your site — for example, my theme code on katemwalsh.com went from 42 KB to 32 KB when I turned compression on in my Gruntfile for node-sass. If you have a larger stylesheet, your savings will be even greater.
There are many ways to do minification — as mentioned, for my theme stylesheet, I use Grunt.js with node-sass and the compression feature turned on. You can also use WordPress plugins — many not only minify your code, but also concatenate files together to reduce requests, too.
Cache
A cache is a must — it generates static HTML files from your PHP files, so your server doesn’t have to generate the PHP each time someone accesses your page. This greatly reduces strain on your server, and gives a great boost to site speed, too. You can use things that are more basic, such as WordPress plugins, or go server-level if you’re more comfortable there. Using a cache can greatly reduce strain on your server, resulting in a speedier site.
Browser Cache
This means means your site’s resources get loaded from the user’s browser instead of your site and server. It works for users who have already visited your site. With browser cache enabled, once someone has already visited your site, their browser may store some of your site’s assets — such as images, JS code, and CSS stylesheets — and use those assets instead of requesting new ones from your site. This reduces their load time, as they don’t have to wait for the server to send out anything; it’s already all there on their computer.
Enabling browser cache on your site is usually a simple .htaccess file edit. GT Metrix has more information.
gzip Compression
 Gzip compression is a compression technology. In a very basic and probably-not-100% correct explanation: when gzip is enabled, your server sends out compressed data, which your browser then uncompresses for display. This decreases the time it takes to transfer information from the server to the browser. This Stack Overflow answer has a longer, better explanation, and this GT Metrix page explains how you can enable gzip.
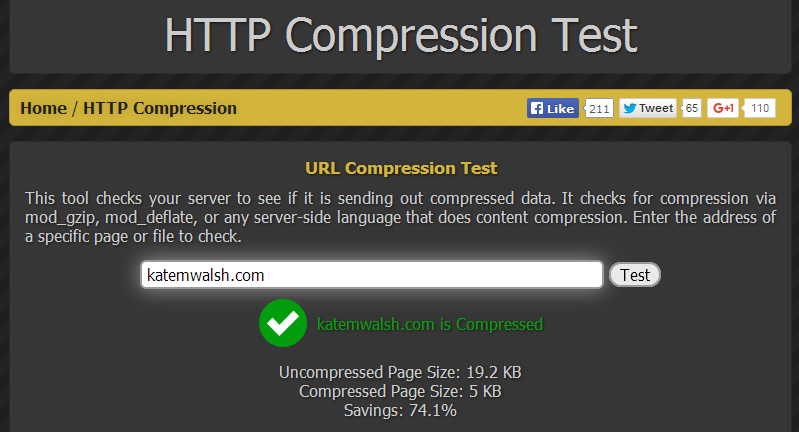
In the image, you can see enabling gzip compression has saved me 72% of the page size. 14 KB isn’t much, but like many of the other smaller tweaks — it adds up.
Keep Alive
Keep Alive is another simple but very effective speed tweak you can make to your server in many instances. Normally, your server opens a new connection for every request (e.g., every piece of HTML, CSS, JS, every image, etc.), downloads that asset, then closes the connection. It repeats this process for every request — again, every separate asset on your site.
Enabling Keep Alive on your server allows multiple assets on the same connection. Instead of opening and closing a connection for each asset, your site will allow multiple resources out on the same connection. While this is generally great for speed, it can have some issues without further tweaks (e.g., adjusting the timeout for a connection). Varvy.com has a great basic explanation, while ngnix explains some of the potential issues with Keep Alive and how you may (or may not) be able to fix them on Apache.
Tools for Speed Optimization
- GTmetrix — Aggregates from Yslow and PageSpeed Insights, too.
- PageSpeed Insights — As far as I know, trying to achieve a perfect score here is an exercise in futility. But Google’s PageSpeed Insights still offers excellent suggestions that can help you speed up your site. As long as you’re in greenish territory, 80+ or so, you’re probably okay.
- Pingdom — Another speed testing tool. Provides a very useful waterfall.
- HTTP Compression Test — Tests whether you’re using gzip or not. The other tools will tell you this anyway, but if you specifically wanted to see your HTTP compression savings, this will help.
WordPress Plugins for Speed Optimization
WordPress Plugins for Site Cache and Code Compression
- WP Fastest Cache — Probably my favorite cache plugin, though I also do like WP Super Cache (probably recommended more often then Fastest).
- Better WordPress Minify — Minifies JS and CSS. I also like Autoptimize but it doesn’t do HTML, and BWP/Autoptimize don’t play well together. Autoptimize also broke my Instagram script and caused weird CSS problems in Firefox when I tried in here? So I tend to lean toward BWP Minify.
- WP HTML Compression — HTML compression. Still works despite being two years old.
WordPress Plugins for Image Speed and Compression
- EWWW Image Optimizer — Great for crushing down images of all types. Comes with a neat bulk optimizing tool.
- Imsanity — I don’t tend to install this on sites I operate on my own because I resize images in Photoshop or similar. But if you’re operating a site with contributors and authors, they may not know how to resize images. Imsanity ensures you’re not getting 4000 x 3000 digital camera images uploaded and used on your site (your users will thank you).
- Jetpack: Photon — If you can’t go all the way with a CDN, WordPress.com’s Jetpack plugin offers Photon. Photon is neat because it serves your images from the WordPress.com servers, taking some of the load off your own. Note that although Photon may cause speed optimization tools to flag your images, they are still cached.
Avoid Micro-Optimization
Although much of the above are small tweaks, each of them generally has an actual change in page load times, server response/performance, or number of requests made. Like literally anything else with computers… you can go deeper and make even more tweaks.
For example, in CSS you should avoid @import and * generally, as they can cause problems (@import because it’s a separate request for each imported stylesheet, * because it’s highly inefficient). However… unless you’re abusing this stuff (e.g., 25 stylesheets @imported, every third selector using *) it generally won’t make a difference at all in how fast your site is. You’re better off working server-level for optimization, and refactoring your CSS for human readability and flexibility.